
I recently built a bulk storage and compute node for my homelab using a Dell R730xd LFF (12-bay). The goal: a place to store terabytes of scraped data, raw videos, images, and backups while still having enough CPU and RAM to run containers and VMs. This guide covers everything from the initial Proxmox install to building a production ZFS pool with mixed drive sizes and Intel Optane metadata acceleration.
If you’re building a similar setup, pay attention to the “gotchas” sections. They’ll save you hours of head-scratching.
The Hardware
- Server: Dell R730xd LFF (12-bay + 2 rear flex bays)
- CPUs: 2x Intel Xeon E5-2660 v4 (28 cores / 56 threads total)
- RAM: 128GB DDR4-2400 ECC
- Network: Intel x540 DP 10GbE + i350 DP 1GbE (built-in NDC)
- Management: iDRAC Enterprise
- RAID Controller: PERC H730 Mini (set to HBA mode for ZFS passthrough)
- Boot Drives (flex bays): 2x 480GB Intel S4510 SATA SSDs
- Optane (PCIe): 2x 480GB Intel 905P NVMe
- Storage HDDs: 6x 8TB HGST Ultrastar He8, 4x 4TB mixed (HGST + Seagate), 2x 10TB Seagate Exos
Total raw HDD capacity: ~84TB. The Optane drives are PCIe cards installed in expansion slots, not in the drive bays.
Used Dell R730xd servers go for $300-600 on eBay depending on configuration. The 8TB HGST drives run about $30-50 each used, the 4TB drives are $15-25, and 10TB Exos drives are around $40-60. Intel Optane 905P 480GB cards are $80-120 used. All in, a setup like this lands somewhere in the $800-1,200 range depending on what deals you find.
Why Not Just Use the Cloud?
Quick math on storing 40TB in the cloud:
- AWS S3 Standard: ~$920/month
- Google Cloud Storage: ~$800/month
- Backblaze B2: ~$200/month (cheapest mainstream option)
Even at the cheapest tier, that’s $2,400/year just for storage. Add egress fees every time you actually pull data out, and it gets worse fast.
A homelab setup like this costs roughly $1,000 upfront plus electricity. At $0.30/kWh, a Dell R730xd with 12 spinning HDDs draws about 250-350W depending on load. That works out to roughly $65-90/month in electricity. So you break even against Backblaze in about 5-6 months, and against S3 in about 5 weeks. After that, it’s pure savings.
The tradeoff is that you’re responsible for your own redundancy, backups, and hardware failures. But that’s what ZFS is for.
Step 1: BIOS Configuration
Before touching the Proxmox installer, get your BIOS settings right. Access BIOS via F2 during POST, or through iDRAC.
Critical Settings
- Boot Mode: UEFI (not Legacy)
- Secure Boot: Disabled (Proxmox doesn’t support it)
- Virtualization Technology (VT-x): Enabled
- VT-d (Intel VT for Directed I/O): Enabled (needed for PCIe passthrough)
- Logical Processor (Hyperthreading): Enabled
- Memory Mapped I/O above 4GB: Enabled
Gotcha: Check Your Boot Mode Before Installing
I installed Proxmox with the BIOS still set to Legacy mode. The installation completed fine, but the server wouldn’t boot afterward. The boot mode active during installation determines how the installer partitions the drive. Legacy creates an MBR partition table. UEFI creates a GPT partition table with an EFI System Partition. They’re incompatible with each other, so a Legacy install won’t boot in UEFI mode and vice versa.
I had to switch the BIOS to UEFI and reinstall from scratch. Check your boot mode before you start. Proxmox 9 expects UEFI.
Step 2: Prepare the Boot Drives
My boot drives are two Intel S4510 480GB enterprise SATA SSDs in the rear flex bays. When I first tried to install Proxmox, the installer reported the drives as 0GB.
Gotcha: Foreign RAID Configuration
These SSDs had been used in a previous RAID array. Even though the PERC H730 was set to HBA mode (passthrough), the drives were marked as “Foreign,” meaning they still had metadata from an old RAID configuration.
The fix is to clear the foreign configuration through iDRAC:
- Open iDRAC web interface
- Navigate to Storage, then Controllers, then PERC H730 Mini
- Find “Foreign Configuration” at the bottom
- Click Clear (not “Import”)
- Wait for the operation to complete
After clearing, the drives changed from “Foreign” to “Non-RAID” state. But the Proxmox installer still showed them as 0GB because old partition tables remained on the drives.
Gotcha: Leftover Partition Tables
Even after clearing the foreign config, residual RAID metadata confused the installer about the drives’ actual size. The fix: boot the Proxmox installer in Debug Mode to get a shell and wipe the drives manually.
At the Proxmox installer boot menu, select “Install Proxmox VE (Terminal UI, Debug Mode)”. This drops you to a shell before the installer starts. Note that wipefs isn’t available in this minimal environment, so use dd directly:
dd if=/dev/zero of=/dev/sdm bs=1M count=100
dd if=/dev/zero of=/dev/sdn bs=1M count=100
Type exit to continue into the installer. The drives should now report their full ~447GB size.
Step 3: Install Proxmox
With the BIOS set to UEFI and the boot drives wiped, the installation is straightforward:
- Filesystem: ZFS (RAID1), which mirrors both SSDs for redundancy
- Harddisk 0 and 1: Your two boot SSDs (leave all HDDs and NVMe as “do not use”)
- Hostname: Something unique if you plan to cluster later
- Management IP: Static address on your network
- DNS: Your router’s IP or a public DNS server
ZFS Advanced Settings
- ashift: 12 (4K sector alignment, correct for all modern drives)
- compress: on (LZ4 by default, free performance gain)
- checksum: on
- copies: 1
- ARC max size: Set this to roughly half your RAM. With 128GB, I used 65536 MB (64GB). The default of ~12GB is far too conservative for a storage server. ZFS ARC is your read cache, and with millions of files, you want it as large as practical.
Step 4: Post-Install Configuration
After the install completes and you boot into Proxmox, open the web UI at https://your-ip:8006 and access the Shell.
Switch to No-Subscription Repositories
Proxmox 9 uses the new deb822 .sources format instead of the old .list files. The enterprise repos require a paid subscription key. Switch to the free community repos instead.
You can do this from the UI under your node, then Updates, then Repositories. Disable the enterprise repo, click Add, select No-Subscription, and add it. Or do it from the shell:
# Remove the enterprise sources file
rm /etc/apt/sources.list.d/pve-enterprise.sources

# Create the no-subscription repo
cat > /etc/apt/sources.list.d/proxmox.sources << 'EOF'
Types: deb
URIs: http://download.proxmox.com/debian/pve
Suites: bookworm
Components: pve-no-subscription
Enabled: yes
EOF
If you have a Ceph enterprise sources file, update it the same way by changing enterprise to no-subscription in /etc/apt/sources.list.d/ceph.sources.
Now update:
apt update && apt full-upgrade -yRemove the Subscription Nag Popup
Every time you log into the Proxmox web UI without a subscription, you get a popup. This one-liner patches it out:
sed -Ezi.bak "s/(function ?\(orig_cmd\) \{)/\1\n\torig_cmd\(\);\n\treturn;/g" /usr/share/javascript/proxmox-widget-toolkit/proxmoxlib.js && systemctl restart pveproxy.serviceClear your browser cache and refresh. The popup is gone.
Note: This needs to be re-applied after any update that includes the proxmox-widget-toolkit package. The .bak file is your safety net if anything breaks.
Step 5: Planning the ZFS Storage Pool
This is where the real fun begins. I have a mix of different-sized drives and I want a single bulk storage pool. Here’s the thought process behind the layout.
Why a Single Pool?
With multiple pools, you’d have to decide upfront how much space each workload gets. “32TB for staging, 8TB for production” sounds reasonable until staging fills up while the other pool is half empty. A single pool with ZFS datasets gives you:
- Shared capacity: all datasets draw from the same pool, with optional quotas
- Shared redundancy: all data benefits from the same protection
- Optane acceleration everywhere: the special vdev accelerates metadata across the entire pool
- Striped performance: reads and writes spread across all vdevs in parallel
The Optane point is the strongest argument. You only have two Optane drives. As a mirrored special vdev, they can only belong to one pool. With separate pools, only one gets metadata acceleration. With a single pool, every file lookup across all your data hits Optane instead of waiting for HDDs to seek.
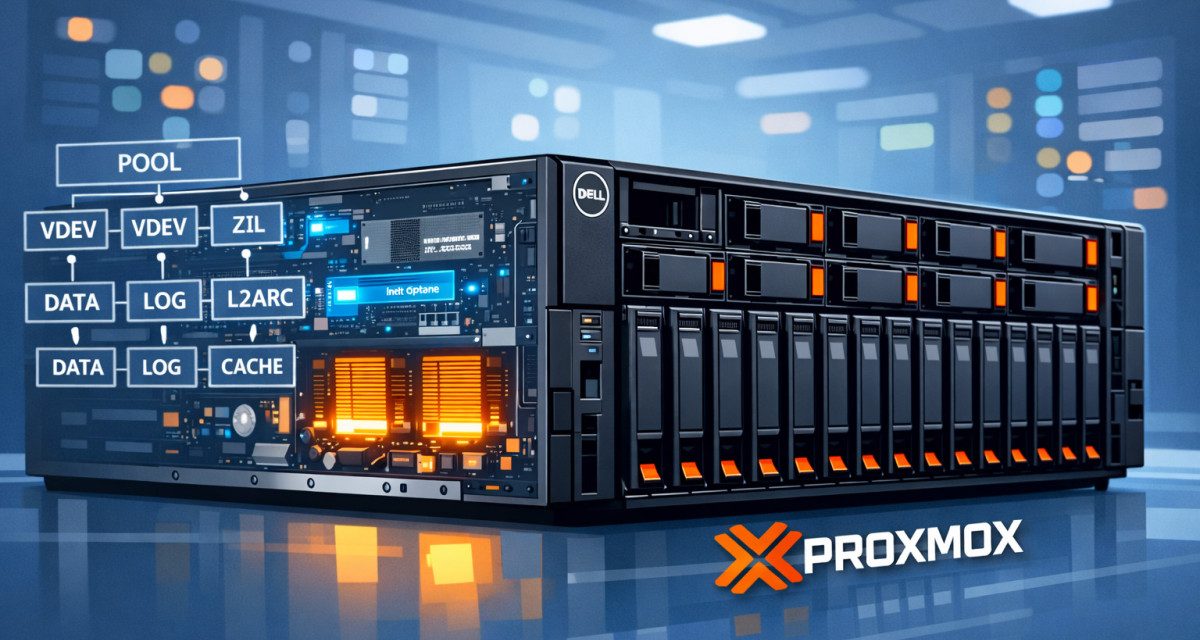
Understanding Vdevs and Redundancy
A ZFS pool is made up of one or more vdevs (virtual devices). ZFS stripes data across all vdevs in a pool. Within each vdev, you configure redundancy (mirror, RAIDZ1, RAIDZ2, etc.).
Critical concept: If any single vdev is completely lost (more drive failures than its redundancy can handle), the entire pool is lost. Not just the data on those drives. Everything. ZFS stripes data across all vdevs, so a single file might have blocks on every vdev. Lose one vdev, and nothing is recoverable.
This means your pool is only as fault-tolerant as your weakest vdev. If you mix RAIDZ2 (tolerates 2 failures) with RAIDZ1 (tolerates 1 failure) in the same pool, two drive failures in the RAIDZ1 group kills everything, including data on the RAIDZ2 group.
The Layout
Given my drive inventory, I went with RAIDZ2 on both HDD groups for consistent two-drive fault tolerance:
| Vdev | Drives | Config | Usable |
|---|---|---|---|
| vdev1 | 6x 8TB HGST Ultrastar | RAIDZ2 | ~32TB |
| vdev2 | 4x 4TB mixed | RAIDZ2 | ~8TB |
| special | 2x 480GB Intel Optane 905P | mirror | metadata + small files |
| Total usable | ~40TB | ||
What About the 10TB Drives?
I originally planned to include the 2x 10TB Seagate Exos as a mirror vdev in the main pool. I pulled them out for several reasons:
- Weakest link: A 2-drive mirror can only tolerate one failure. If both 10TB drives die, the entire pool dies with them.
- Can’t remove RAIDZ vdevs: Once added to a pool, RAIDZ vdevs are permanent. You can always add vdevs, but you can never remove them. Plan carefully.
- IOPS imbalance: A 2-drive vdev has far fewer IOPS than a 6-drive vdev, creating a bottleneck since ZFS has to wait for the slowest vdev.
Instead, I turned them into a dedicated backup pool (covered in Step 8). This gives me failure isolation: if the main storage pool somehow dies, my backups survive on completely separate drives.
The Special Vdev (Optane Metadata Acceleration)
The special keyword tells ZFS to store metadata on the Optane drives instead of the HDDs. Metadata includes directory listings, file locations, and indirect blocks. On spinning disks, metadata lookups require physical seeks. On Optane, they’re nearly instant.
With special_small_blocks set, you can also store small files entirely on Optane. For workloads with millions of tiny files (web scraping, thumbnails, config files), this is transformative.
Warning: The special vdev cannot be removed from a pool once added. If both Optane drives fail, the entire pool is lost. Always mirror your special vdev.
Step 6: Wipe Drives and Create the Pool
First, identify your drives by their persistent IDs. Never use /dev/sd* names for pool creation. Those can change between reboots and you risk accidentally referencing the wrong drive.
ls -la /dev/disk/by-id/ | grep -v partMap each drive to its serial number and physical slot. You need to know exactly which drives go into which vdev.
Wipe all data drives (not your boot drives):
# Wipe HDDs
for d in sda sdb sdc sdd sde sdf sdg sdh sdi sdj; do
  wipefs -a /dev/$d
  sgdisk --zap-all /dev/$d
done

# Wipe Optane NVMe drives
for d in nvme0n1 nvme1n1; do
  wipefs -a /dev/$d
  sgdisk --zap-all /dev/$d
done
Now create the pool. Replace the drive IDs below with your own from the by-id output:
zpool create -f -o ashift=12 \
  -O compression=lz4 \
  -O atime=off \
  -O xattr=sa \
  storage \
  raidz2 \
    /dev/disk/by-id/ata-HGST_HUH728080ALE601_SERIAL1 \
    /dev/disk/by-id/ata-HGST_HUH728080ALE601_SERIAL2 \
    /dev/disk/by-id/ata-HGST_HUH728080ALE601_SERIAL3 \
    /dev/disk/by-id/ata-HGST_HUH728080ALE601_SERIAL4 \
    /dev/disk/by-id/ata-HGST_HUH728080ALE601_SERIAL5 \
    /dev/disk/by-id/ata-HGST_HUH728080ALE601_SERIAL6 \
  raidz2 \
    /dev/disk/by-id/ata-HGST_HMS5C4040ALE640_SERIAL7 \
    /dev/disk/by-id/ata-HGST_HMS5C4040ALE640_SERIAL8 \
    /dev/disk/by-id/ata-ST4000DM000-1F2168_SERIAL9 \
    /dev/disk/by-id/ata-ST4000DM000-1F2168_SERIAL10 \
  special mirror \
    /dev/disk/by-id/nvme-INTEL_SSDPED1D480GAH_SERIAL11 \
    /dev/disk/by-id/nvme-INTEL_SSDPED1D480GAH_SERIAL12
Breaking down the flags:
- -f: Force creation. Needed when mixing vdev types with different fault tolerance levels (RAIDZ2 data vdevs vs mirrored special vdev).
- ashift=12: 4K sector alignment. Correct for all modern drives.
- compression=lz4: Fast, transparent compression. Almost always a net win since it reduces I/O at the cost of minimal CPU.
- atime=off: Disables access time updates. Without this, every file read triggers a metadata write, which is terrible for performance.
- xattr=sa: Stores extended attributes in the inode rather than a separate hidden directory. Better performance for SELinux, ACLs, and Samba.
Enable Optane acceleration for small files:
zfs set special_small_blocks=64K storageAny file smaller than 64KB now goes straight to Optane instead of the HDDs.
Verify the Pool
zpool status storage
zpool list storage
You should see all vdevs ONLINE with zero errors and your total usable capacity.
Step 7: Create Datasets
Datasets are ZFS’s killer feature for organization. They share the same pool but each gets independent compression, quotas, snapshots, and settings. Think of them as intelligent directories.
zfs create storage/staging      # Raw scrapes, downloads, unprocessed data
zfs create storage/production    # Clean, validated, user-facing content
zfs create storage/scratch       # Temp workspace, experiments, throwaway
Optional quotas to prevent one use case from eating everything:
zfs set quota=25T storage/staging
zfs set quota=10T storage/production
zfs set quota=5T storage/scratch
Quotas are adjustable on the fly. zfs set quota=30T storage/staging takes effect instantly. You can also skip quotas entirely and manage space manually.
Step 8: Create a Separate Backup Pool
Remember those 10TB drives we left out of the main pool? They become a dedicated backup target. Keeping backups on the same pool as your production data defeats the purpose. If the pool dies, you lose both. A separate backup pool on different physical drives gives you actual failure isolation.
zpool create -o ashift=12 \
  -O compression=lz4 \
  -O atime=off \
  backups \
  mirror \
    /dev/disk/by-id/ata-ST10000NM0086-2AA101_SERIAL1 \
    /dev/disk/by-id/ata-ST10000NM0086-2AA101_SERIAL2
This gives you ~10TB of mirrored backup storage on completely separate drives from your main pool.
Step 9: Add Storage to Proxmox
ZFS works at the OS level, but Proxmox needs to know about it to use it for VMs and backups.
# VM and container disk storage (main pool)
pvesm add zfspool storage-pool -pool storage -content images,rootdir

# Backup storage (separate pool)
pvesm add dir backup-pool -path /backups -content backup
This creates two entries in the Proxmox UI sidebar. The zfspool type manages VM disks as ZFS volumes (zvols), while the dir type manages backup files as regular files in a directory.
Why two different types? Proxmox’s zfspool storage plugin only knows how to create and manage zvols (raw block devices for VMs). Backup files, ISOs, and templates are regular files that need a dir-type storage entry. Different code paths in Proxmox, same physical drives underneath.
Step 10: Enable Autoexpand and Scrub Schedule
Two final housekeeping items:
# Allow pool to grow automatically when you replace drives with larger ones
zpool set autoexpand=on storage

# Check if a scrub schedule already exists (Proxmox usually sets one up)
cat /etc/cron.d/zfsutils-linux
A scrub reads every block of data on the pool and verifies checksums. If anything has silently corrupted, ZFS detects it and repairs it using the RAIDZ2 redundancy. Without regular scrubs, bad sectors could accumulate undetected until you actually try to read that data.
On a 40TB HDD pool, a full scrub takes several hours to a full day. Monthly is the standard recommendation. It runs in the background without taking the pool offline, though you’ll notice reduced performance while it’s running.
Upgrading Drives Without Downtime
One of ZFS’s best features: you can replace drives one at a time with larger ones, and the pool expands automatically. To upgrade 6x 8TB to 6x 20TB:
- Pull drive 1, insert 20TB replacement
- Run
zpool replace storage old-drive-id new-drive-id - Wait for resilver to finish (hours, depending on data)
- Repeat for each remaining drive
- After the last original drive is replaced, the vdev automatically grows
The pool stays online the entire time. No downtime, no data migration, no pool recreation. The vdev won’t grow until the last original drive is replaced because ZFS sizes to the smallest drive in each vdev.
The Final Setup
| Component | Purpose | Details |
|---|---|---|
| rpool (boot) | Proxmox OS | 2x 480GB Intel S4510, ZFS mirror |
| storage pool | Bulk data | 10 HDDs + 2 Optane, ~40TB usable |
| storage/staging | Raw ingestion | Web scrapes, downloads, messy data |
| storage/production | Clean content | User-facing files, curated datasets |
| storage/scratch | Temp work | Experiments, intermediate processing |
| backups pool | VM backups | 2x 10TB Exos mirror, ~10TB usable |
The whole build came in around $1,000. At $0.30/kWh, monthly electricity runs about $65-90. Compare that to $200-920/month for equivalent cloud storage, and this setup pays for itself within a few months. After that, you’re just paying for electricity and the occasional replacement drive.
More importantly, you own the hardware. No egress fees, no API rate limits, no surprise pricing changes. Just raw storage you can hammer as hard as you want.


Recent Comments